Creating Block Layout in Dynific Addons for Elementor
When displaying posts, products, or custom content in Elementor, the default layouts often limit your design flexibility.
With Block Layout in Dynific Addons for Elementor, you can design a fully custom layout for each item (post, product, or CPT) and reuse it across your website using Post Blocks Adv widgets.
This helps you build consistent, dynamic, and visually appealing listing layouts without writing any code.
When Do You Need a Block Layout?
You will use a Block Layout when:
- Creating blog or archive pages
- Designing single post layouts
- Displaying custom post types (like Movies, Products, etc.)
- Building individual sections such as Call-to-Action (CTA), Team Member sections, and Feature blocks
- Designing grids, lists, sliders, or carousels
In short, Block Layout acts as a reusable design structure that can be used anywhere dynamic content needs to be displayed.
Steps to Create a Block Layout
Step 1: Create a New Block Layout
- Go to Dynific Addon → Add New Template
- Give template Name for internal use
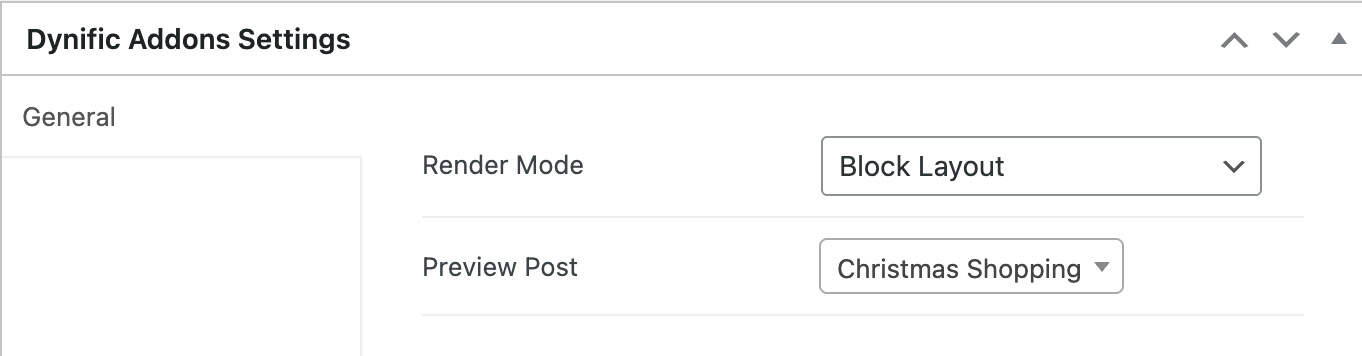
- Now under Dynific Addons for Elementor Settings, do the following configuration.
- Render Mode: Block Layout
- Preview Post: Select a post to be used as a preview while designing the layout in the Elementor editor.
- Now save the template and edit with Elementor and start designing your layout.
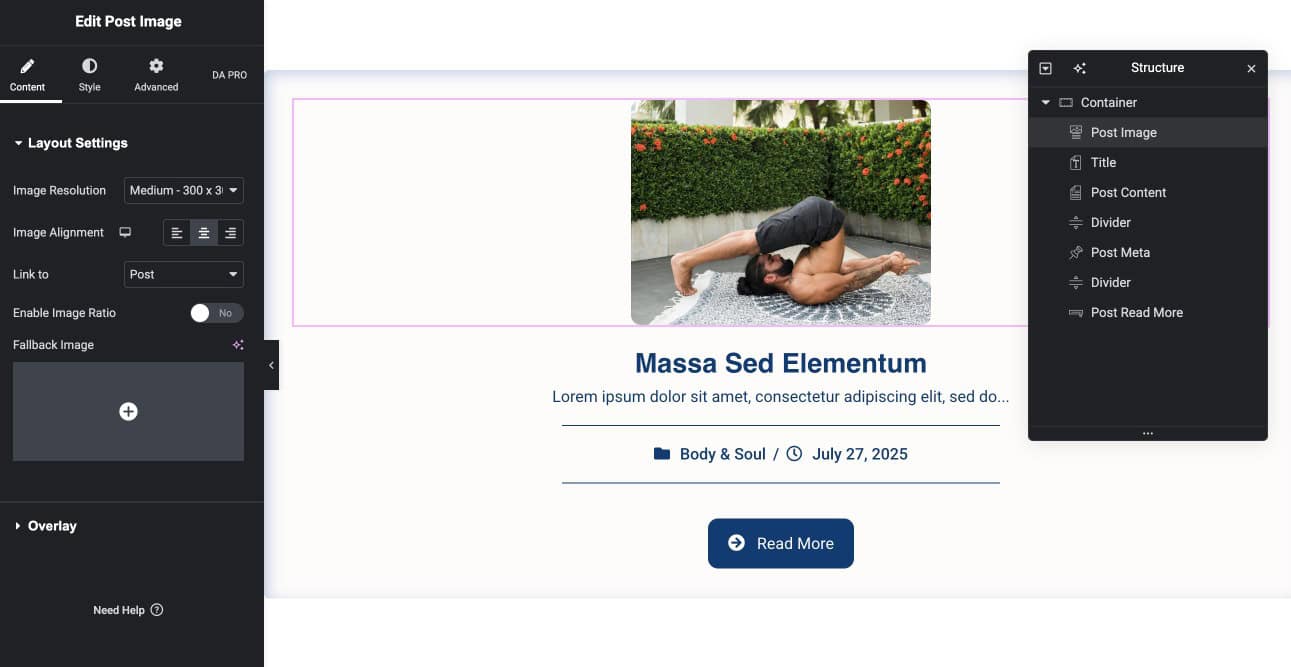
Step 2: Design the Block Layout in Elementor
- Click Edit with Elementor
- Start designing your post card
- Here, we are displaying the dynamic post details using the dynific addons widgets.
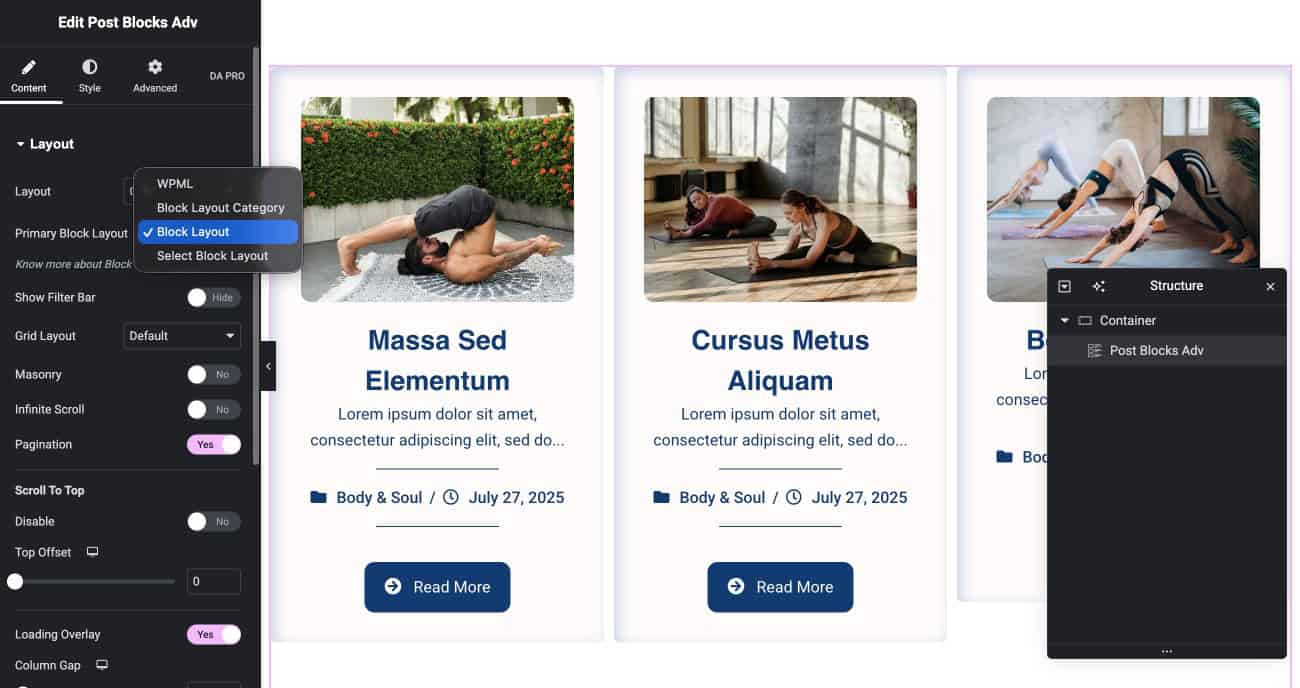
Step 3: Use Block Layout in Post Block Adv Widget
Once your layout is ready:
- Open any page or template with Elementor
- Add Post Block Adv widget
- In widget layout settings:
- Select the Block Layout that you created.
The widget will automatically loop through posts and apply your layout to each item.
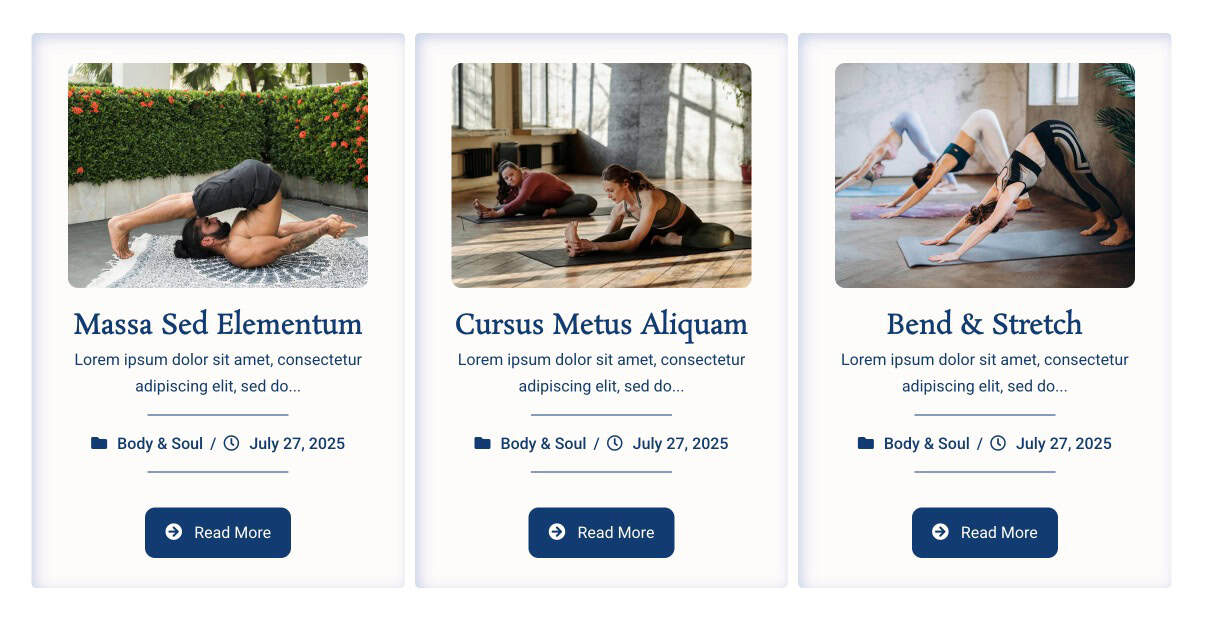
Final Result
Your posts will now be displayed in a fully customized layout using your Block Layout design, making your website more consistent and visually engaging.