
Understanding DA Templates
A DA Template (registered as “Dynific Global Template”) is a reusable Elementor design that pulls in live data from whatever post, term, author, or archive it’s attached to. You build it once in the Elementor editor, then tell it where it should apply — a single post type, a taxonomy archive, the 404 page, a repeatable block, and so on — instead of manually placing it on every page.

Creating a DA Template
Go to Dynific Templates → Add New. This opens a template creation modal — you’re not immediately dropped into the Elementor editor:
- Click Edit with Elementor — the template is created as a draft with everything you just chose already saved, and you land straight in the Elementor editor ready to design.
- Choose a type: a grid of template types (Normal, Single Post Template, Taxonomy Archive Template, Post Type Archive Template, Block Layout, 404 Template, Search Template, Author Archive, Date Archive, ACF Blocks). Hover the
?on any option for a short description; some types may be marked Pro-only depending on your license. - Configure it: the form that appears adapts to the type you picked — e.g. Usage Area for a Normal template, Post Type + Preview Post for a Single Post Template, Taxonomy + Preview Term for an Archive template, or Field Location/Type for ACF Blocks. Every type also lets you name the template and choose Auto Apply / page layout where relevant.


Render Mode
Render Mode is the core choice: what kind of page or content area this template is meant to fill.
| Render Mode | What it does |
|---|---|
| Normal | Doesn’t replace a whole page — instead, it injects into a specific spot in your theme (see Usage Area below). Use this for things like a custom notice bar, an author bio block, or anything that should appear alongside existing theme content rather than replace it. |
| Single Post Template | Replaces/wraps the content of a single post or page of a chosen post type (e.g. all Posts, all Products). |
| Taxonomy Archive Template | Replaces/wraps a taxonomy archive — a category, tag, or custom taxonomy term listing page. |
| Post Type Archive Template | Replaces/wraps a post type’s archive listing page (e.g. the Shop page for Products). |
| Block Layout | Not tied to a page at all — a reusable block, meant to be dropped in as a repeatable card/row design inside a listing or loop widget. |
| 404 Template | Custom design for the site’s “not found” page. |
| Search Template | Custom design for the search results page. |
| Author Archive | Custom design for an author’s archive page. |
| Date Archive | Custom design for date-based archives (e.g. /2026/08/). |
| ACF Blocks (Repeater / Flexible) | Only available when ACF or ACF Pro is active. A layout bound to a specific ACF Repeater or Flexible Content field, rendered once per row/layout. |

Usage Area (Normal mode only)
When Render Mode is set to Normal, a Usage Area dropdown appears, letting you pick which theme hook the template should auto-inject into (e.g. before/after the header, in the footer). If your theme’s exact hook isn’t listed, choose the custom option and enter the hook name directly.
A Rules tab on the same panel then lets you narrow where that injected template is allowed to show:
- Restrict to Single Post / Archive / Search / 404 / Home page types.
- Restrict to specific post types or taxonomies.
- Include or exclude specific post IDs or term IDs.
Auto Apply (site-wide default)
Check Auto Apply on a template to make it the site-wide default for its post type or taxonomy — no further assignment needed. Only one template per post type/taxonomy should have Auto Apply checked at a time; it’s what the plugin falls back to when nothing more specific is set (see Where a Template Applies, below).
Template Frame (Theme Default / Canvas / Full Width)
The Template dropdown controls how much of your theme’s chrome wraps the design:
- Theme Default — keeps your theme’s normal header/footer/sidebar.
- Elementor Canvas — strips the header, footer, and sidebar entirely; just your design, full page.
- Elementor Full Width — full-width content area, but keeps the theme’s header and footer.
Where a Template Applies
Once you’ve built templates, the plugin decides which one to show using this priority order:
For a single post/page:
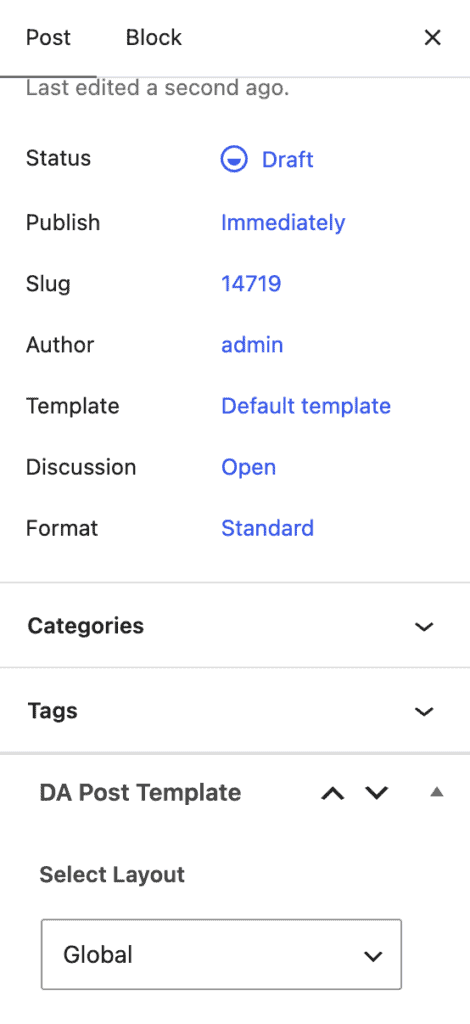
- A per-post override, set on the post/page itself via the DA Post Template metabox (choices: Global, None, or a specific template).
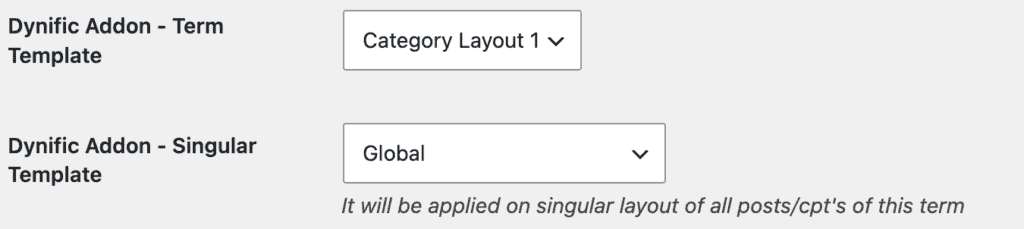
- If that’s left on Global, a per-term override — set on a taxonomy term’s edit screen via Singular Template — applies to every post in that term.
- If neither is set, the site-wide Auto Apply default for that post type is used.
- If nothing matches, the theme renders the post normally with no DA template.
For a taxonomy archive:
- A per-term override, set on the term’s edit screen via Term Template (Global, None, or a specific template).
- If left on Global, the site-wide Auto Apply default for that taxonomy is used.
Post type archives, the author archive, date archives, 404, and search each use their Auto Apply-flagged template directly — there’s no per-item override for those.
Using a Template Manually
Every DA Template also gets a shortcode (shown in the Dynific Addons Usage box on the template’s edit screen) — e.g. [INSERT_ELEMENTOR id="123"] — plus its PHP equivalent, so you can drop a template into any theme file or another Elementor widget manually, independent of its render mode.
