
Template Display Conditions
Every DA Template needs to know exactly where it should — and shouldn’t — appear. This page covers every control that narrows a template’s visibility, from the broad (Render Mode, Auto Apply) down to the specific (excluding a single post by ID).
Level 1: Render Mode
Render Mode is the first and broadest condition — it decides what kind of page the template is even eligible for (single post, taxonomy archive, 404, block layout, etc.). See Understanding DA Templates for the full list. Everything below narrows within that render mode.
Level 2: Scope (Post Type / Taxonomy)
For Single Post Template mode, the Post Type field on the General tab limits the template to one post type (e.g. only Posts, or only Products) — it won’t be considered for any other post type.
For Taxonomy Archive Template mode, the equivalent Taxonomy field scopes it to one taxonomy (e.g. only Category archives, not Tag archives).
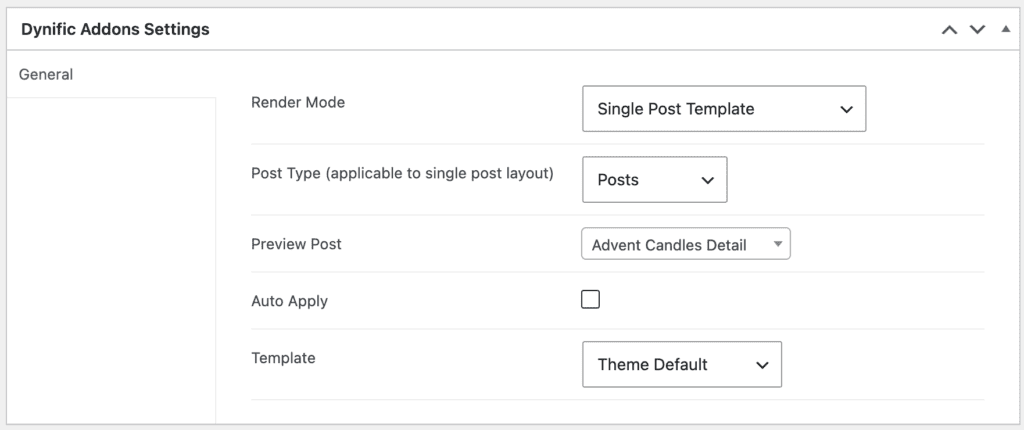
Level 3: Auto Apply (site-wide default)
Check Auto Apply to make this the default template for its post type/taxonomy across the whole site. Only one template per post type (or per taxonomy) should have this checked — it’s the fallback used whenever nothing more specific overrides it.
Level 4: Manual Overrides (per-post / per-term)
These live on the content itself, not on the template:
- DA Post Template metabox (on any individual post/page’s edit screen): set to Global to use the Auto Apply default, None to suppress any DA template on this one item, or pick a specific Single Post Template to force just for this item.
- Term Template (on a taxonomy term’s edit screen): the same Global / None / specific template choice, but for that term’s own archive page.
- Singular Template (also on the term’s edit screen): assigns a Single Post Template to every post belonging to that term — useful for “all Products in the Sale category use this layout” style rules without editing each product.
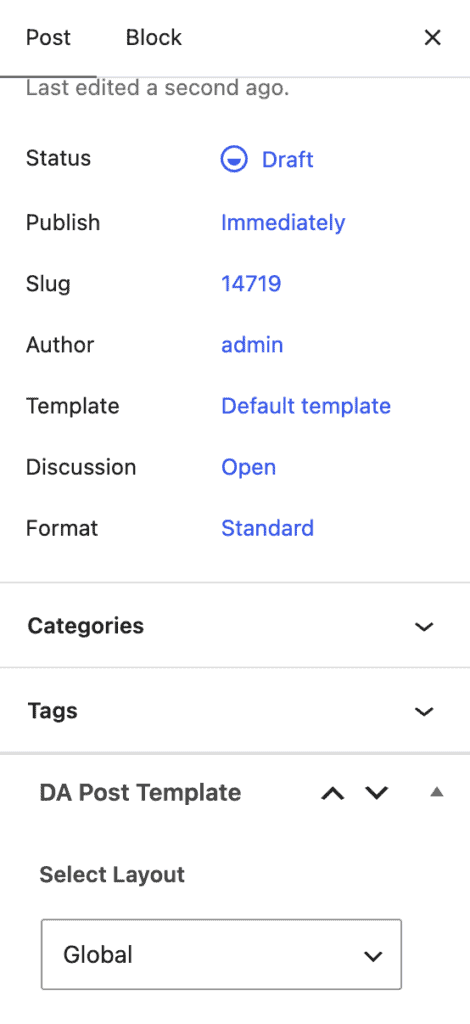
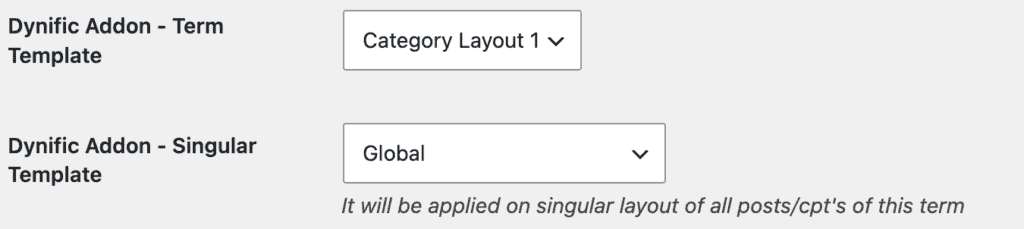
These four levels resolve in order — per-post override, then per-term override, then Auto Apply default — so a specific choice always beats a general one. See Where a Template Applies in Understanding DA Templates for the full precedence chain.
Level 5: The Rules Tab (Normal mode only)
When Render Mode is set to Normal — i.e. the template is being hook-injected into a spot in your theme rather than replacing a whole page — a Rules tab appears with finer-grained conditions:
| Field | What it does |
|---|---|
| Apply To | Checkboxes for which page types the injection is allowed on: Single Post, Archive, Search, 404, Home. |
| Post Type | Restricts a Single Post injection to specific post types. |
| Selected Posts | Comma-separated post IDs — if set, the template only appears on these posts (whitelist). |
| Excluding Posts | Comma-separated post IDs the template should never appear on (blacklist), even if it otherwise matches. |
| Taxonomies | Restricts an Archive injection to specific taxonomies. |
| Selected Terms | Comma-separated term IDs — whitelist for archive pages. |
| Excluding Terms | Comma-separated term IDs — blacklist for archive pages. |
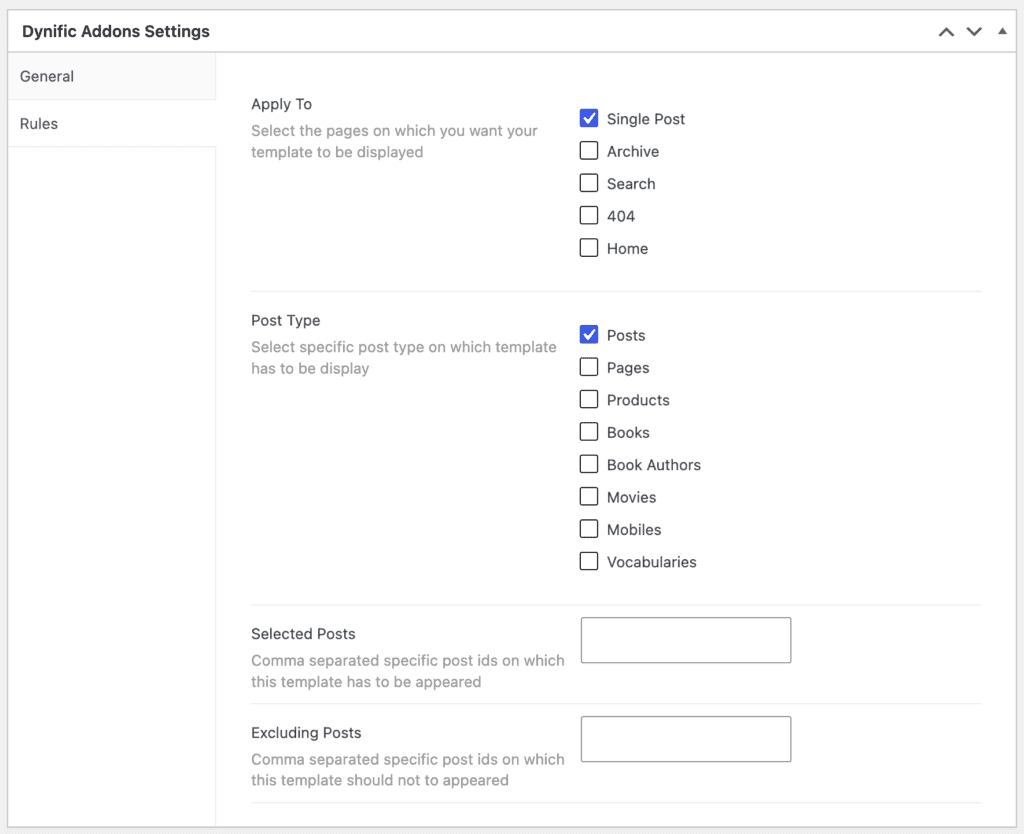
Note: The Rules tab only applies to Normal-mode templates (theme-hook injections). Single Post, Archive, and other page-replacing render modes are scoped entirely through Post Type/Taxonomy + Auto Apply + the per-post/per-term overrides above — they don’t use the Rules tab.
Example
To show a promo banner on every Post except three specific ones, and nowhere else on the site:
- Create a template, set Render Mode → Normal, pick a Usage Area (e.g. before content).
- On the Rules tab: check Apply To → Single Post, check Post Type → Post, and enter the three post IDs to skip under Excluding Posts.