
Creating a ACF Flexible Block Layout
If you want more control over how your WordPress pages are structured, the Flexible Content Field in ACF is a powerful solution that gives you exactly that. It works like a custom layout builder, allowing you to create and arrange different content blocks such as hero sections, image galleries, testimonials, services, and more, all directly from the WordPress admin panel without writing any code.
With Dynific Addons for Elementor’s ACF Flexible block layout, you can take this flexibility even further by designing each layout visually using Elementor and displaying it dynamically on the frontend.
It means you can create any type of layout for your website, reuse it across multiple pages, and manage all content easily from the backend.
Steps to Create a ACF Flexible Block Layout
Here are the steps that lets you start using the ACF Flexible layout.
Step 1: Create ACF Flexible Content Fields
First, you need to create a Flexible Content field in ACF.
- Go to ACF → Field Groups → Add New
- Add a Flexible Content field type.
- Now add two layouts:
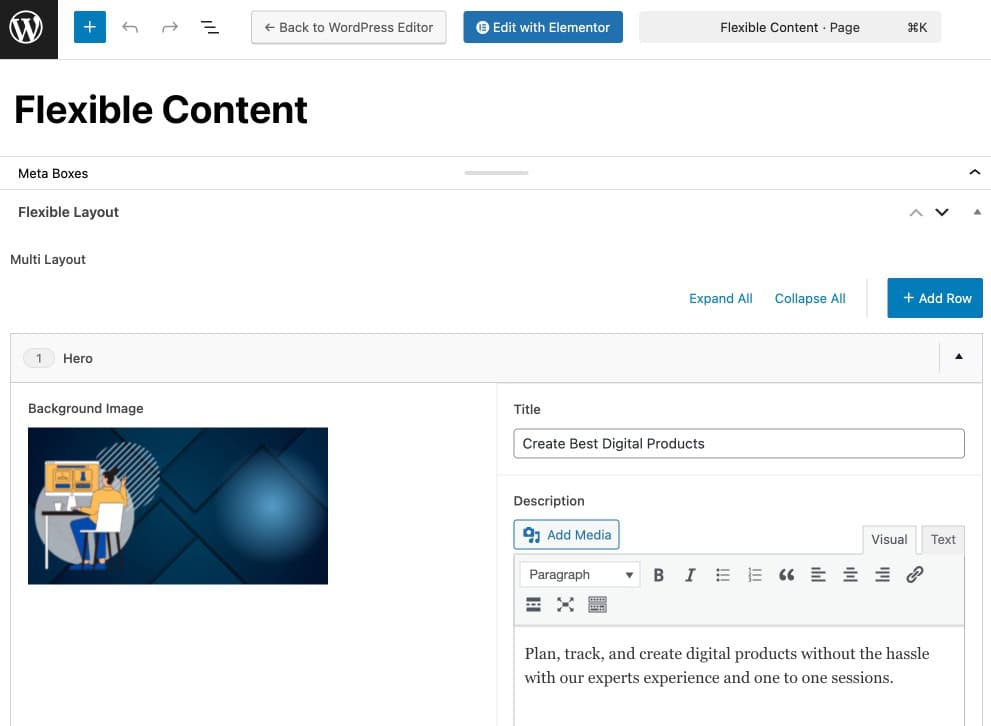
- Layout 1: Hero Section
Add fields like:- Title
- Description
- Button Text
- Background Image
- Layout 2: Services Section
Add fields like: - Service Title
- Service Description
- Service Image
- Layout 1: Hero Section
- After that set Location Rules to Page / Post (as needed) and publish the field group.

Step 2: Add Fields Data in the Page
- Open the page where you assigned the ACF field
- You will see the Flexible Content fields, click on Add Row button.
- Now, fill the required details for each field.
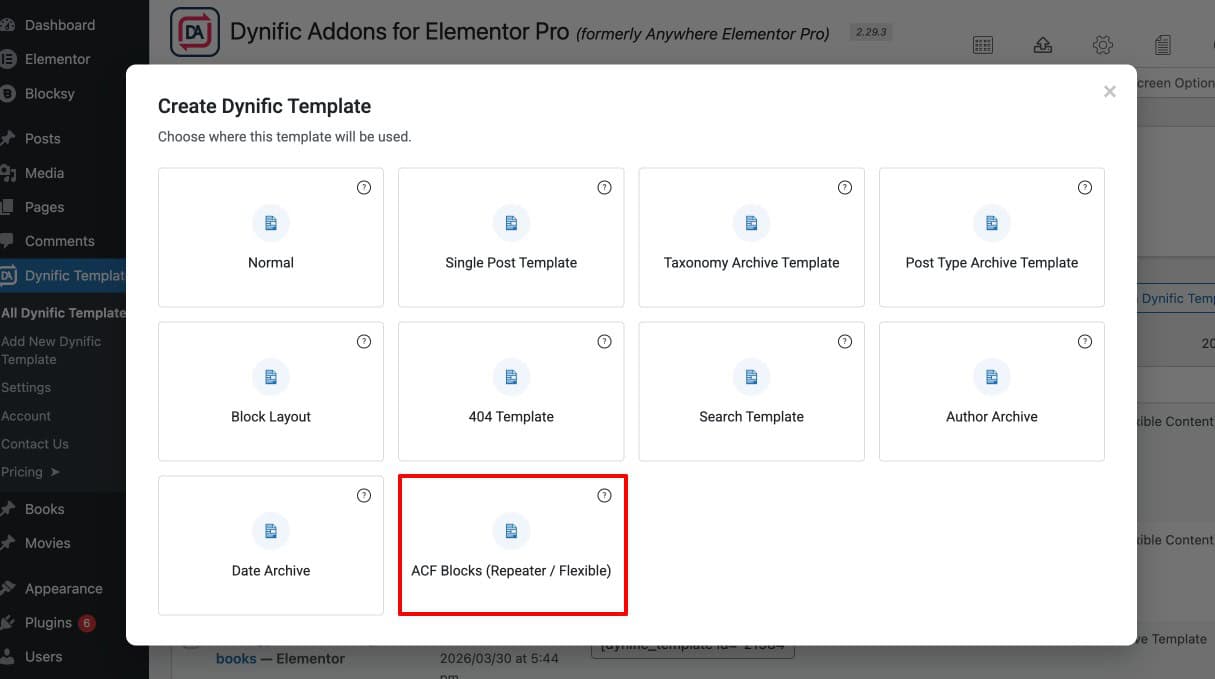
Step 3: Create ACF Flexible Block Template
Now create a template in Dynific Addons:
- Go to Dynific Addons → Templates → Add New
- Choose ACF Block Repeater/Flexible Template
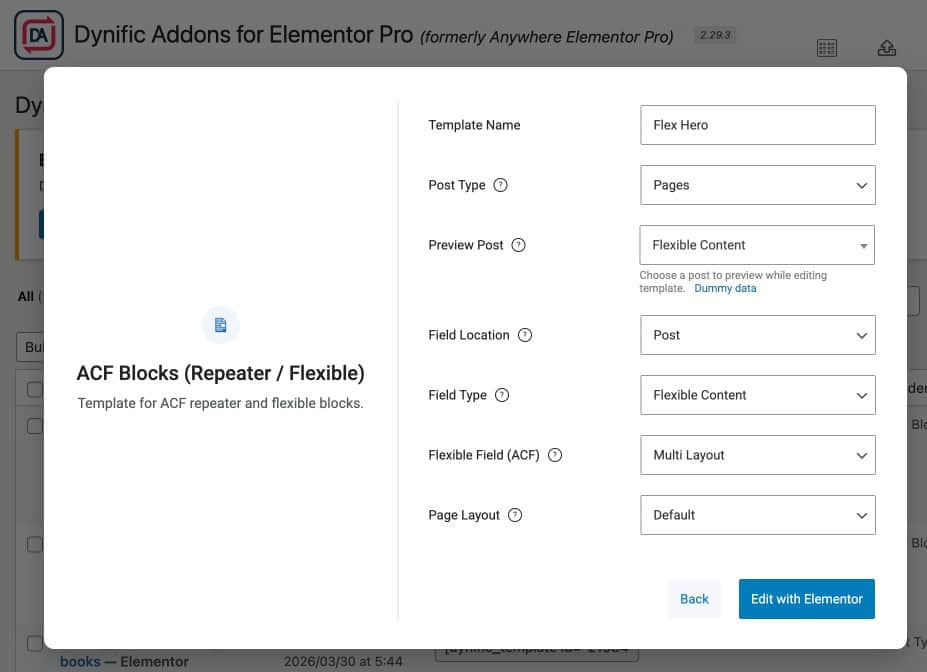
- Next, configure the template settings:
- Post Type: Page
- Field Location: Post/Page
- Field Type: Flexible Content
- Preview Post: Select your created page
- Page Layout: Default
- Flexible Field: Select your ACF field
- Click Edit with Elementor.
Step 4: Design Layouts Using Dynific Addons
Now you will design each layout (Hero & Services) separately.
- Drag and drop ACF Fields V2 widget
- Use it to display dynamic data
- Then, configure the widget settings as:
- Field Type: Image / Text (based on field)
- Source: Post Field
- Parent Field Type: Flexible Field
- Parent Field: Select your parent flexible field.
- Sub Field: Select specific field for data you want to display.
Repeat these steps for each fields and layouts. This setting ensures data is pulled from the correct flexible layout.


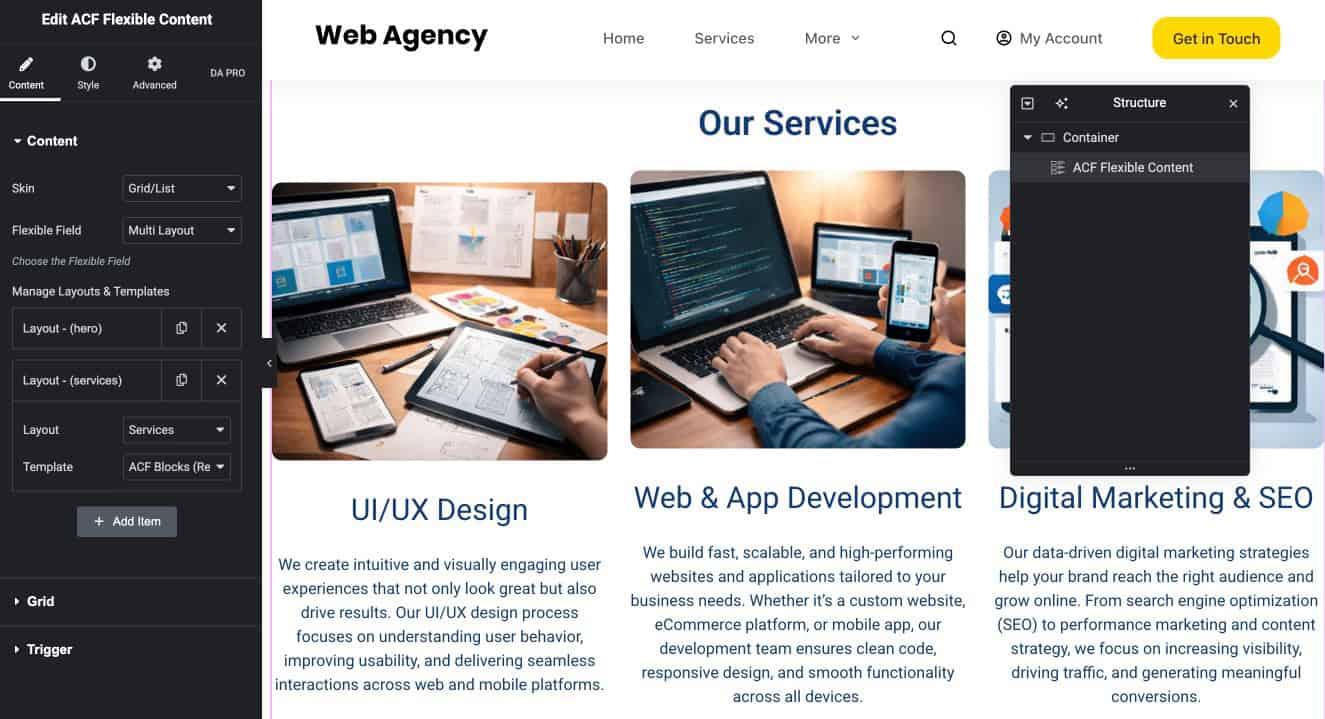
Step 5: Display Layouts on the Page
Now you will display everything on the frontend.
- Open your page with Elementor
- Drag ACF Flexible Content widget.
- Now, configure the Widget by
- Selecting your Flexible Field
- Then, click on Add item option and
- Choose layout (Hero / Services)
- Select the template you created
Step 6: Preview Your Flexible Layout
Once you have designed all layouts and added them to your page, it’s time to preview how everything looks on the frontend.
- Click Update / Publish on the page
- Open the page in a new tab or click Preview
- You will see all your layouts (Hero, Services, etc.) displayed on the page
The layouts will appear in the same order as you added them in the ACF Flexible Content field.
If you make any changes:
- Update the content in the page → it will reflect automatically
- Update the template design → changes will apply everywhere the layout is used
