How to Add Triggers in Elementor (Carousel & Accordion)
DA Triggers is an excellent new addition to the Dynific Addons for Elementor (formerly AnyWhere Elementor) widget library. It works well with some DA widget that supports carousel and accordion layout, like DA-Post Blocks Advanced, ACF Repeaters, ACF Gallery, and ACF Flexible content widget.
You can use the DA – Trigger widget to invoke an action when the trigger item clicks. For example, triggers can be used to do all sorts of things like moving between slides, pausing the animation, collapsing, or expanding all accordion tabs in a single click.
So, let’s start with creating one using Dynific Addons for Elementor (formerly AnyWhere Elementor) .
Key Takeaways
- What the DA Triggers widget is and how it works
- How to add DA Triggers to carousels and accordions
- Setup steps for DA Post Blocks Advanced with triggers
- Tips for building custom trigger buttons anywhere on your layout
- Where to find the trigger ID for DA widgets
What Are DA Triggers in Elementor?
Generally, all DA widgets support carousel and accordion layouts and are backed up with basic navigational controls. Using this, you can easily change the look and feel of navigational arrows and change their position.
However, these basic controls are limited. You may need more flexibility and control.
So, to attain complete flexibility and advanced controls, AnyWhere Elementor Pro comes with a widget called DA – Triggers.
Using Triggers, you can place your navigation control anywhere on the page. Not only that but a lot more design options are provided to change or modify navigation control completely. So, let’s go through and see what you can build using this fantastic widget.
How to add Triggers in Elementor using Dynific Addons for Elementor
Carousels are an excellent way to showcase your content. It comes with straightforward previous/next control without any controls to alter their placements.
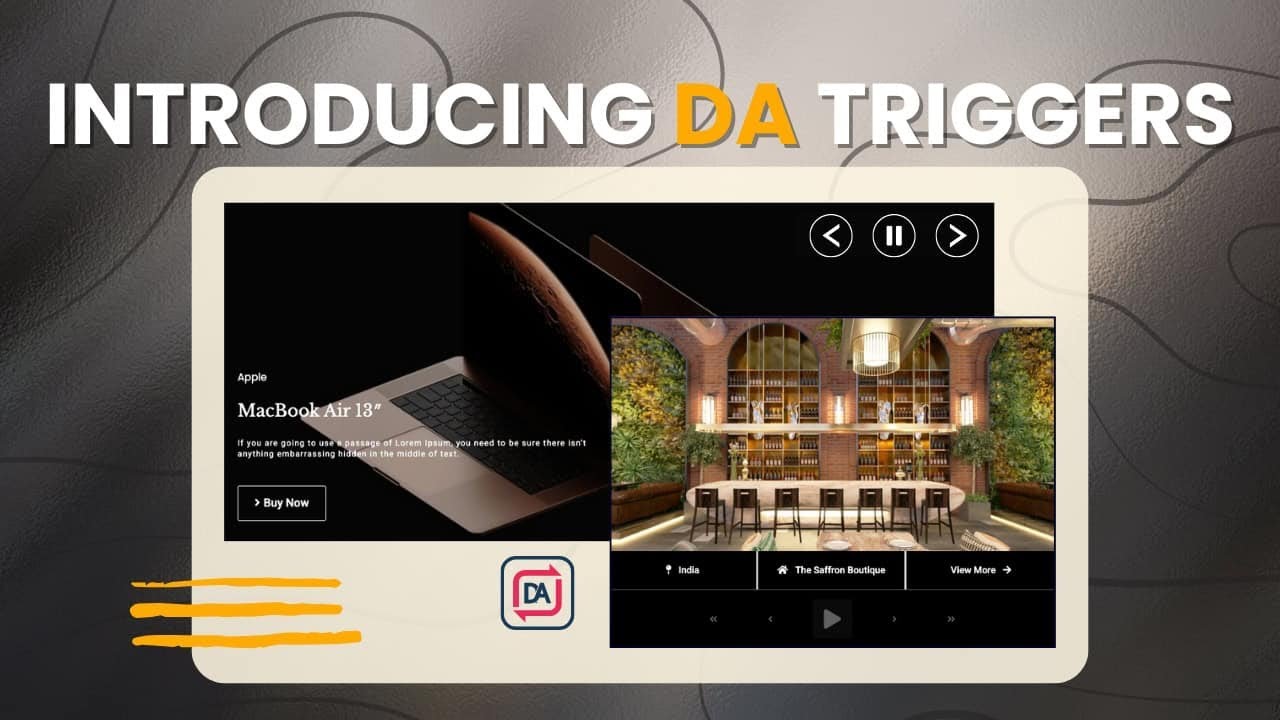
But with advanced triggers, you will have enormous design flexibility, like a pause and play button. And the first and last buttons which can be used to jump to the specific slide directly. The following layout shows how these triggers can spice up even an ordinary carousel/accordion.
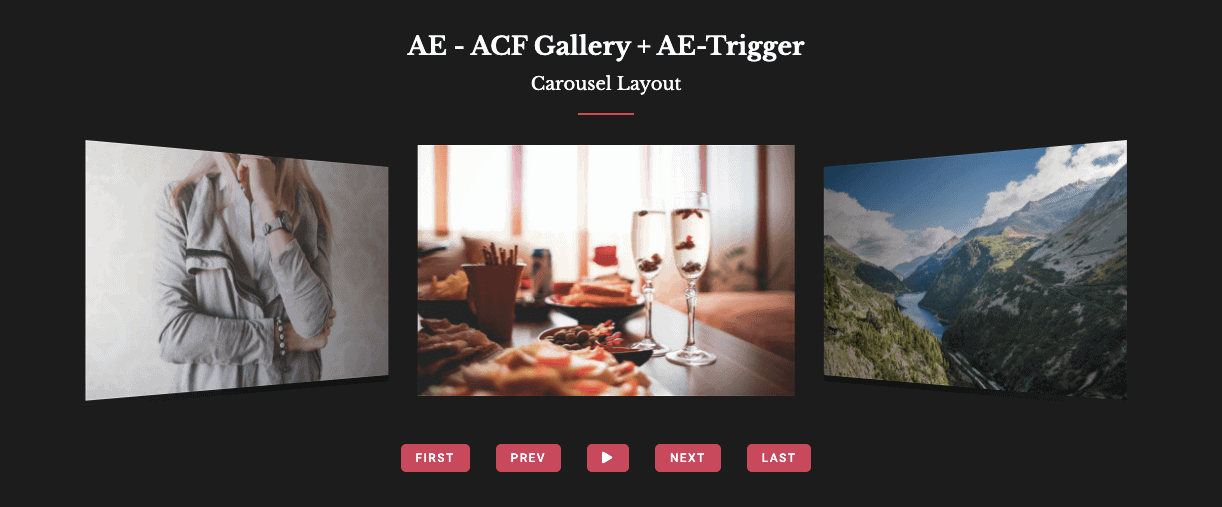
Isn’t it an excellent design to use an ACF gallery with triggers? You can also use ACF Flexible fields, ACF Repeater fields, and your posts loop.
Have a look at this – an accordion layout with some excellent controls that can be used to expand and collapse items, and jump to the next or previous accordion item.
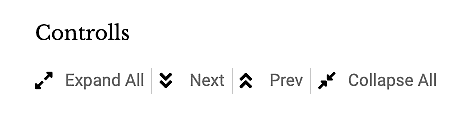
Using these controls, you can give a unique look to your accordion layouts.
You can also check out some cool demos of DA Triggers to see how it works in action.
Step-by-Step: Using DA Triggers for Accordions
In this tutorial, we will create triggers for the accordion layout using the Post Block advanced and DA triggers widgets.
Let’s see the step-by-step implementation process to achieve the above layout design.
Step: 1 – Designing Layout for the Sliders/Accordions
Firstly, we will create a block layout template to showcase our post. You can skip this step and jump directly to the next one if you know how to create block layouts.
Just create a new DA Template, select random mode as the block layout, and then edit it with Elementor.
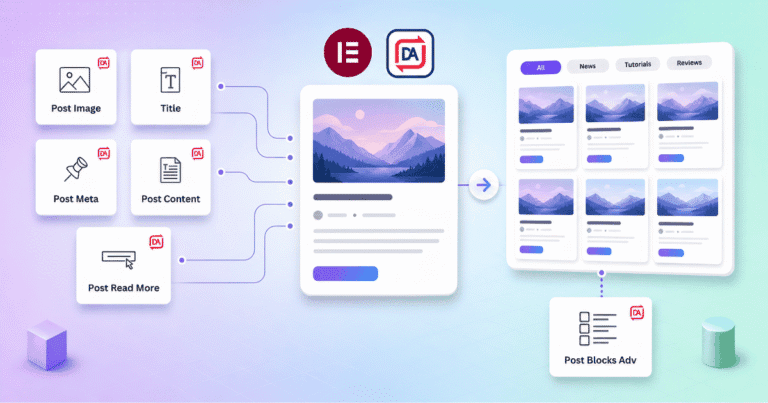
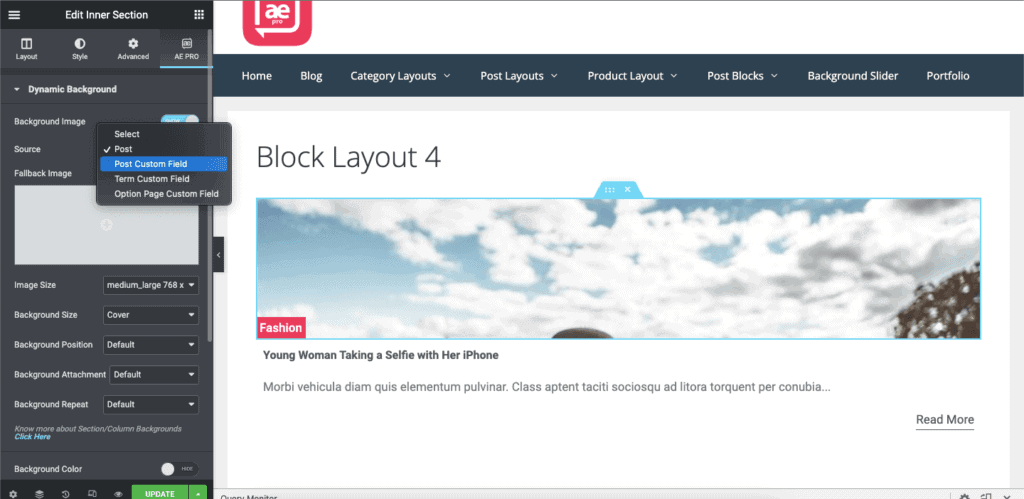
Here, we are using a Dynamic background in the section and selecting a source as a post to get the post’s featured image. To show category, title, and description, we can use DA Post Meta, DA Post Title, DA Post Content, and Post Read More widgets, respectively.
Step 2 – Creating Post Carousel/Accordion
Now, we will create a new page where we want to display the accordion post. And start to edit the page with Elementor.
Next, drag the Post Block advanced widget and select the layout as an accordion. Then select the block layout that we have just created to use here.

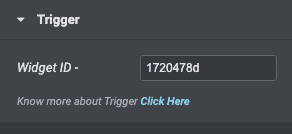
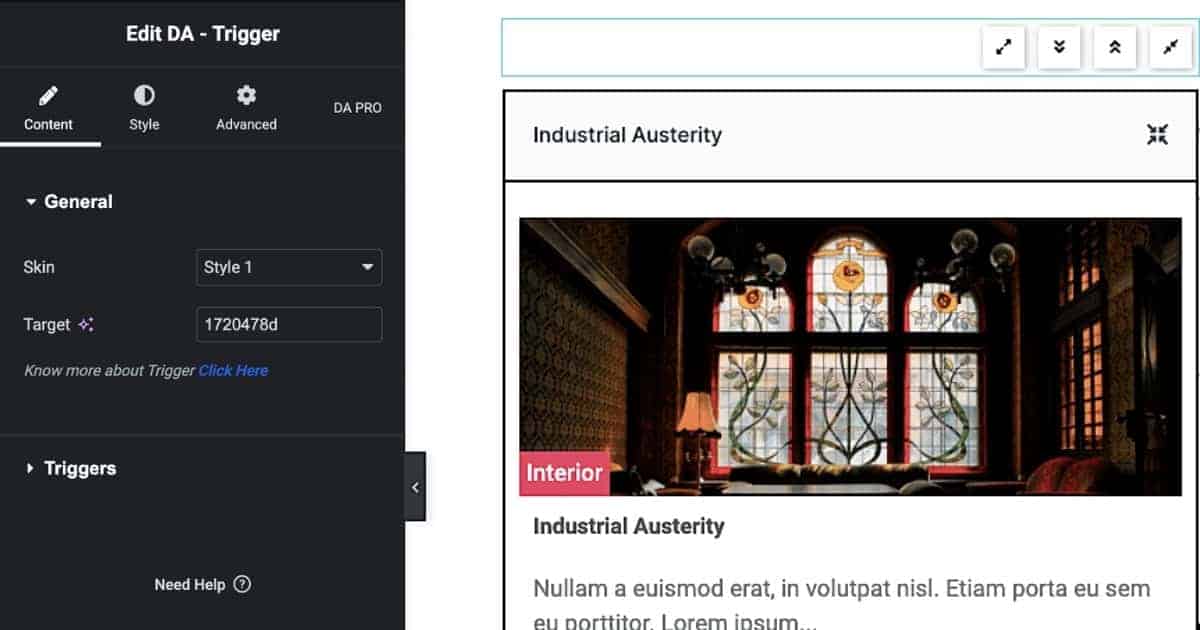
At the bottom of the Post block Advanced settings, we can find the Triggers Widget ID.
Step 3 – Adding Triggers on the Slider Widgets
Now, drag DA trigger widgets and place them according to your requirements. Here, we are invoking triggers for the post-block adv widget. We can use it anywhere from left to right or top to bottom.
In the target field, enter the trigger ID to invoke the trigger action on Carousel or Accordion layouts. You will get this ID under the Trigger label of all the widgets supporting the Carousel and Accordion layout styles.
For example, in Post Blocks Advanced, when you select layout style as Carousel or Accordion, you will see the Trigger option at the bottom, copy the id, and paste it.
Here, we are using the trigger widget ID of the Post block advanced widget.
Woohoo! That’s it. We have just created a beautiful accordion layout.
You can try and play with another setting option to create your own desired trigger layout.
Similarly, you can use triggers to achieve a carousel layout with DA post block Advanced and DA triggers widgets.
FAQs on DA-Trigger in Dynific Addons for Elementor
What is the DA Trigger widget in Dynific Addons for Elementor?
DA Trigger is a widget that lets you add custom navigation buttons to carousels and accordions built with DA widgets.
Can I use triggers without Elementor?
No, DA Triggers is part of Dynific Addons for Elementor, which requires Elementor (free or Pro) to work.
Can I use triggers for ACF Repeaters and Galleries?
Yes, DA Triggers works well with widgets that use ACF Repeater, Gallery, and Flexible Content.
Do I need to write any code to use DA Triggers?
No, it’s a completely code-free solution. You just need to configure the widget settings in the Elementor editor.
Final Thoughts: Improve UX with DA Triggers
Don’t you feel Triggers are such an extensive addition? Triggers can add extra controls to your carousel & accordions, giving a next-level user experience. Excited about using triggers! Check out the DA trigger Documentation.